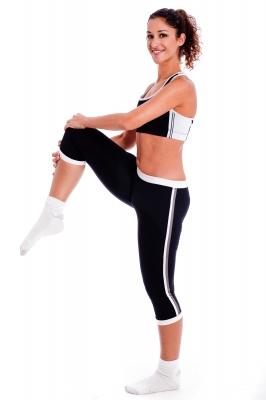
Tight Shoulders? Let's fix that!

Having proper shoulder mobility is a foundational piece of good human movement and effective exercise programs.  If we are training the upper body to pull and push in multiple planes through a full range of motion, great shoulder mobility is a necessity.

When shoulder mobility becomes or is an issue we most commonly find ourselves with less than desirable spinal positions and open rib cages working to make up for our tight shoulders.  For many people it is not a matter of if, but rather when they will injure a shoulder.  Fortunately, you can overcome shoulder pain and inflexibility fairly easily if you address it properly.

Below are some methods to work on and maintain good shoulder mobility.  If you’re currently dealing with shoulder impairments, they will improve symptoms; if you are not, they will help you maintain optimal shoulder health and function, as well as help prevent future injury.

  • Banded Shoulder Distraction. Place a green band on a bar about 2” above head, face into rack and hold the band supported on the back of the wrist, move into a lunge and allow the band to pull your arm up and forward, with your palm up to the sky, and making sure to drive your chest towards your knee.
  • Lacrosse Ball Sub-scapula Release. Lay with a lacrosse ball along the edge of the shoulder blade proximal to the spine, take your straight arm thumb down to the opposite hip, move diagonal across body to an overhead position thumb into ground, perform 5 reps slowly, adjust ball up edge of scapula, return to the starting position and repeat in 3 different positions.
  • Lacrosse Ball Posterior Capsule Release.  Lay on your back with a lacrosse ball on the back of shoulder and roll over onto the ball -- working it into the back of the shoulder.
  • Partner Internal Rotation Stretch.   Lay on your back with bent knees and the soles of your feet on the ground. Move into a hip bridge, focus on having your hips high and your femur in line with your torso angle.  Place the back of the hands on the lower back and have a partner hold down your shoulders as you slowly lower hip to the ground, repeat a few times.  (If you do not have a partner do not worry, a modification is shown in the video below.)
  • Kneeling Shoulder Stretch.  On your knees facing a 24’’+/- box, approximately 3 feet away, place your palms on box and drive your chest down toward the ground, bracing your abdomen and relaxing with straight arms.
  • Reach, Roll, Lift. Lay in a prone position face down, make a fist and place thumb on your forehead, with the opposite arm reach and pull arm overhead out of retraction crawling with fingertips, when you can’t go any farther turn thumb up and lift your arm for 1 sec., repeat a few times on each arm.

Resources: http://www.crossfitinvictus.com/coaches/are-your-shoulders-tight/

Improving your Wrist Mobility

A lack of proper wrist mobility can limit the ability for people in movements like cleans, front squats, overhead squats, etc.  We have been hearing comments from members like, "my wrist get very sore" or my forearms are getting a shooting pain."  Poor wrist mobility (which is most likely is tied to poor thoracic posture) can be the product of many factors, such as typing on a keyboard or playing on your smart phone all too often.  There are remedies and we want to reduce the amount of people with this problem.  Below are some great preventative and proactive movements that can be done to improve wrist mobility:

A. Wrist Rotations.  Wrap your fingers up and roll your wrists around in every direction.  If any position feels tender or limited try to hold that position for a few seconds.  This should be done a few times throughout your day; not only in the gym. 

B. Static Holds.  Pull or push your wrists into flexion and/or extension and hold for a minimum of 20-30 seconds. 

C. Prayers.  Standing, place your hands together in front of your body.  Keeping contact between your hands, lower them.  Go as far as possible.  The longer you can keep them together, the better the stretch.  At the bottom, reverse your hands so fingers are pointing down, keep your hands together, and bring your hands back up. 

D. Wrist Walks.  Place palms on a wall in front of you, with your arms straight and fingers toward the ceiling.  Keep contact with the wall and walk your hands down the wall.  Move your hands down the wall as far as you can while keeping your palms from coming off the wall.  When you cannot go any further, turn your hand around and walk your wrists back up the wall as far as possible. 

E.  Planche push-up position.  Get into a plank position.  Turn you hands inward so the tips of your fingers are pointing at your toes.  Keeping your mid-section tight, shift your body forward so you have an angle from your shoulders to your wrists.  Hold this for about 30 seconds and repeat.  If this is too much, try dropping to your knees. 

F. Front Squat Rack Position.  If you have pain when you are getting into the front rack position of a front squat then we need to work the range of motion required for a proper front squat.  Your shoulders should be holding the bar in its proper position, but good wrist mobility helps get the bar and keep the bar in its correct position.  Load a bar on a rack.  Set up in the rack position, with your elbows up and pointing as far forward as possible and the weight resting on your shoulders.   Pick the bar off the rack rotate your elbows forward, then re-rack the bar.  Repeat until you see an improvement in mobility.

G. Ring Push-ups.  Adjust the height of the rings (the lower the rings the harder the exercise).  Grip the rings, keeping your body straight and legs fully extended behind you.  Slowly lower yourself towards the rings.  Pause at the bottom of the movement and then push yourself back up. Try not to lock out your elbows to maintain tension throughout the movement.  Repeat.

H. Double Kettlebell Rack Walk.  Take a kettlebell in each hand.  Lift the kettlebells to your chin so your wrists face one another.  Rest the kettlebells on your upper arms and shoulders.  Walk forward and hold the kettlebells in the same position throughout the entire exercise.

Sources: http://boxlifemagazine.com/health/wrist-mobility-why-its-important-how-to-improve-it and http://www.crossfitinvictus.com/coaches/tips-for-improved-wrist-mobility/

How to Improve Flexibility and Mobility for Squatting

How to Improve Hip Flexibility and Mobility for Squatting

Lack of hip flexibility might be the main reason people are prevented from squatting properly. This is caused by hip flexion.  What’s is hip flexion?

Hip flexion is basically the technical term for a decrease in the angle between the thigh and pelvis. As your knee rises, hip flexion occurs:

There are multiple muscles involved in this action, and if do not have enough flexibility, you probably will not be able to squat correctly.

Luckily, there are some simple stretching exercises that you can do to improve hip flexibility and mobility and thus minimize and eventually eliminate the problem.  Here are some recommended stretches:

Kneeling Hip Flexor Stretch

This is one of the best stretches for improving hip flexibility:

Work on this for 2-3 minutes per leg, and then move on to the next stretch below.

Psoas Quad Stretch

The psoas major is a pelvic muscle that plays a key role in hip flexion.

When this muscle is too tight, squatting properly is almost impossible.

One of the stretches that can help is a simple psoas quad stretch. Here is a video showing you how to do it:

This stretch can be rather uncomfortable if you are lacking flexibility.

You perform this stretch by assuming the position shown, and then driving your knee into the ground and leaning forward, getting a good stretch, followed by a release.

Perform this drive and release pattern for 2-3 minutes for each leg.

Your Weekly Hip Flexibility and Mobility Routine

Do the above stretches as described 3-4 times per week.


How to Improve Ankle Flexibility and Mobility for Squatting

Ankle tightness can prevent you from being able to properly drop into the bottom of a squat.  A proper squat consists of: a. the weight solidly on your heels, b. your chest up, and c. your spine in a neutral position.

If your heels want to lift off the ground when squatting, or if you find yourself shifting the weight forward onto your toes and have trouble getting your butt down to the parallel position or lower, then ankle tightness is likely the reason.

One way to increase ankle flexibility and mobility, is to mash up and stretch the tissues of your feet, ankles, and calves. Here’s a great video from MobilityWOD showing how to do it properly:

A lacrosse ball is needed for this (size 1 or 2), which can be used to perform quite a few great mobility exercises.

Your Weekly Ankle Flexibility and Mobility Routine

Do the above routine 3-4 times per week, either before or after your hip work.

References: http://www.muscleforlife.com/how-to-improve-flexibility-and-mobility-for-squatting/

Be More Human